Follow these steps below to setup your mailbox using the IMAP system.
These steps are only for Mac Mail on a Mac, we have a different guides for Outlook
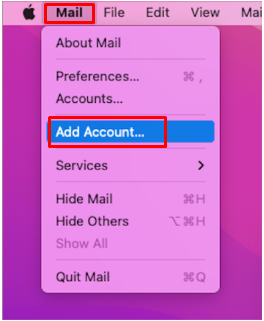
- After you have launched Mac Mail, from the Mail menu click on Add Account…
- A new account provider window will open, select “Other Mail Account..” as the type of provider and click on Continue

- Mac Mail will now request some basic information from you. Enter the required information and click on Sign In

- Name: This is the Display Name that people will see when you send them an email
- Email Address: Your mailbox’s email address
- Password: Your password
- If Mac Mail has issues auto-configuring your Mailbox you will be shown this new screen. Similar to the previous screen enter your Email Address and Password, followed with the Account type and Incoming and Outgoing Mail Servers, finally clicking on Sign In
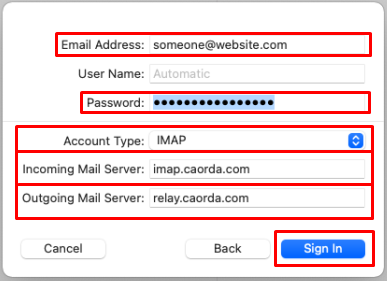
- Account Type: IMAP
- Incoming Mail Server: imap.caorda.com
- Outgoing Mail Server: relay.caorda.com
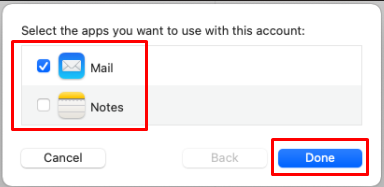
- Unless you typed in any of this information incorrectly your Mac Mail will prompt you with what you want to sync between Mac Mail and the IMAP service, ensure that Mail is select and click on Done
- Congratulations, you have successfully setup your Mac Mail to retrieve the contents of your Mailbox using IMAP.