Caorda Logo
  • Design
    • Design
    • Website Design
    • Branding & Logo Design
    • Print Design
    • Our Design Process
  • Development
    • Development
    • WordPress Development
    • Website Development
    • Mobile Apps
    • Software Development
    • Database Development
  • Hosting
    • Hosting
    • Web Hosting
    • Email & Exchange Hosting
    • Secure File Hosting & FTP Solutions
    • Managed VPS Hosting
  • Digital Marketing
    • Digital Marketing
    • SEO Services
    • Google Ads & SEM
    • Social Media Marketing Services
    • Blog & Article Writing
    • Email Marketing Services
  • About Us
  • Blog
  • Careers
  • Our Work
  • Pay an Invoice
  • Support
  • Contact
  • +1.250.598.6772
  • COVID-19 Policy
Caorda Logo
  • Design
    • Website Design
    • Branding & Logo Design
    • Print Design
  • Development
    • Website Development
    • Mobile Apps
    • Software
    • Databases
  • Hosting
    • Web Hosting
    • Emails
    • Secure FTP
    • Managed VPS
  • Digital Marketing
    • SEO Services
    • Google Ads & SEM
    • Email Marketing
    • Social Media

FAQ

7
  • What version of Outlook am I using?
  • IMAP – Set Default Folders on Apple mobile device (IOS 18+)
  • How to Pay an Invoice
  • How do I receive Maintenance Notifications?
  • Spam – Email Rate Limit
  • Does Caorda offer cPanel ?
  • Where is my data located?

Spam

7
  • How do I manage my Quarantine?
  • How do I mark an email as Safe?
  • Can you block an entire country from sending you Email?
  • How do I block an email address or domain?
  • How do I manage my settings?
  • How do I login to my Spam firewall?
  • How are rules inherited?

Email POP/IMAP

24
  • IMAP – Set Default Folders on Apple mobile device (IOS 18+)
  • IMAP – Setup my Mailbox on an Apple mobile device (IOS 18+)
  • POP – Setup my Mailbox in Outlook 365 for Windows
  • How do I change my email password?
  • How do I archive my emails in Outlook
  • IMAP – I can’t see all my folders in Outlook
  • Password Policies
  • Administrator – Create a new email account
  • IMAP – Setup my Mailbox in Outlook on an iOS Device
  • IMAP – Setup my Mailbox in Outlook 365 for Windows
  • IMAP – Setup my Mailbox in Outlook 365 for Mac
  • IMAP – Setup my Mailbox in Mozilla Thunderbird
  • IMAP – Setup my Mailbox in Mac Mail
  • IMAP – Setup my Mailbox in Outlook on an Android Device
  • IMAP – Setup my Mailbox on an Android device (Android 12+)
  • IMAP – Setup my Mailbox on an Apple mobile device (IOS 16+)
  • POP – Setup my Mailbox in Outlook 2013-2016 for Windows
  • POP – Setup my Mailbox in Outlook 365 for Mac
  • POP – Setup my Mailbox in Mac Mail
  • Setup POP retrieval using GMAIL
  • Webmail – Add an Email Signature in Webmail
  • Webmail – How do I access my email from the Web ?
  • Webmail – Setting up mail forwarding
  • Webmail – Setting up out of office auto response

Email Hosted Exchange

8
  • EXCHANGE – Setup my Mailbox on an Apple mobile device (IOS 16+)
  • EXCHANGE – Setup in Outlook 365 for Windows
  • How do I archive my emails in Outlook
  • Webmail – How do I access my email from the Web ?
  • Enable Contacts on the Outlook App on Android
  • EXCHANGE – Setup Outlook 2010-2016
  • EXCHANGE – Setup my Mailbox in Outlook on an iOS Device
  • EXCHANGE – Setup my Mailbox in Outlook on an Android Device

FTP

12
  • How do I check my disk usage?
  • Add users to a Group
  • How to create a User
  • How to create a Group with Directory Access
  • Enforce SSH Key based Authentication for a User
  • How to receive files using the File Sharing option
  • How to Send files to a client using the File Sharing option
  • Reset your own Multi-Factor Authentication as a User
  • Reset a single User’s Multi-Factor Authentication
  • Setting up Multi-Factor Authentication for a Domain Group
  • Setup Multi-Factor Authentication for a Single User
  • Setup SSH Key Authentication for a User

Website

2
  • What is Caorda’s WordPress Maintenance Plan ?
  • Why am I not getting emails from my Caorda QA site ?
  • Home
  • Caorda Support
  • FTP
  • How to Send files to a client using the File Sharing option
View Categories

How to Send files to a client using the File Sharing option

 This guide will demonstrate how to share a file using the file sharing feature. This will allow you to send large files by providing a link to the file and the individual receiving your link can download the file to their local machine. This is useful for sharing large files that otherwise cannot be sent through messaging services or email.


    1. Login to the Web Client.


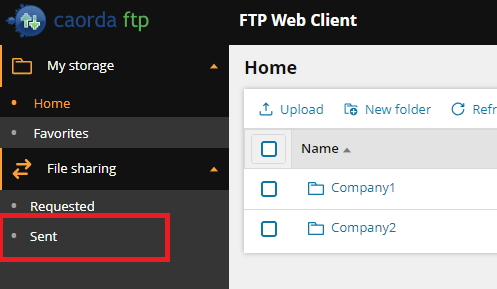
    2. Select the Sent page from the navigation.


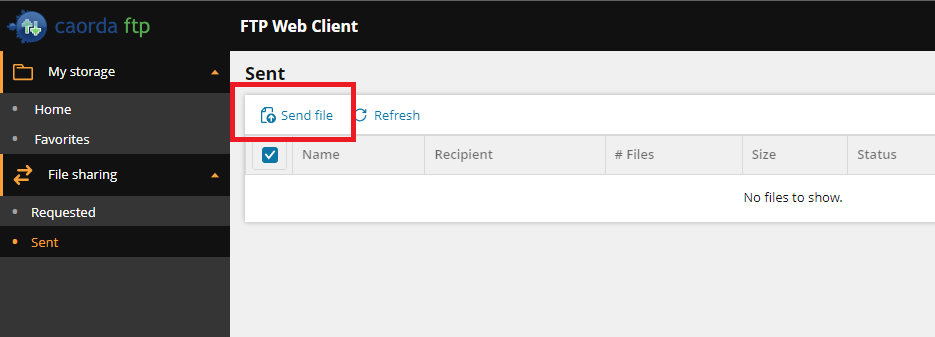
    3. The Sent page contains a list of your current and expired file sharing requests. To create a new file share click Send File.


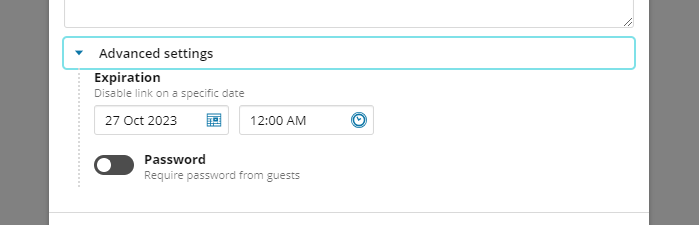
    4. After clicking Send File a pop-up will appear where you can enter the details of your new file sharing link. Enter a Title and an optional Description to better describe it’s purpose.


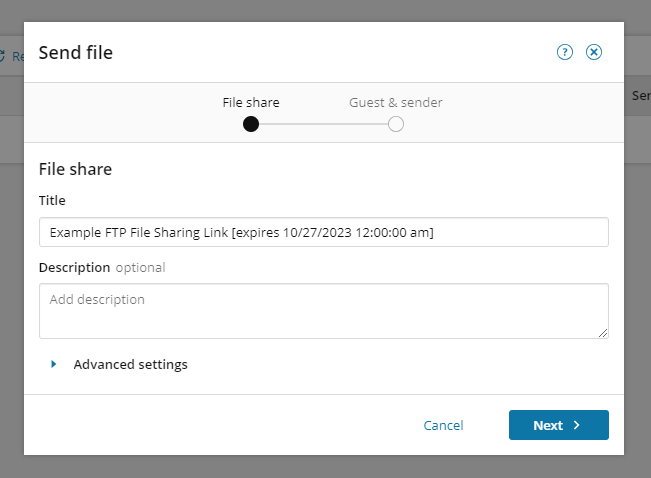
       You also have the option to have this file sharing link expire after a certain date, or to password protect this file share so that the receiving user must enter the password to download the files.


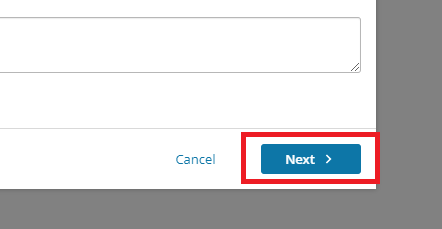
    5. When you have your file sharing details entered click Next.


    6. The next screen is where you will enter the receiving users email address. They will receive an email with the details of this file share.


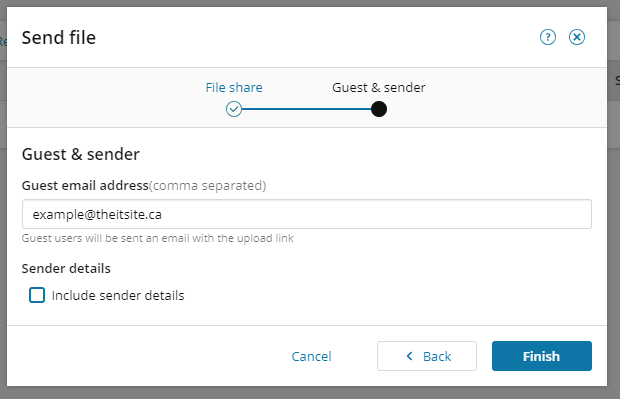
       If you would like the email that will be sent to contain your personal information so that the receiving user knows who has sent this email you can provide those details. Click the Include Sender Details checkbox and fill out your email address and name.
       

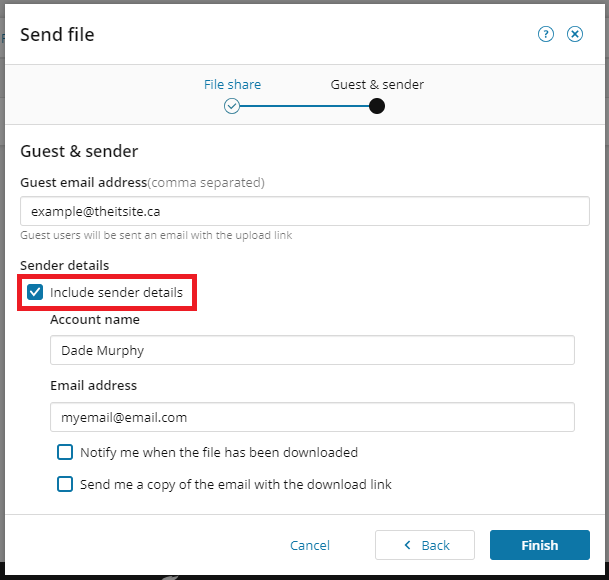
      Included in these settings you also have the option to receive a notification when the user has downloaded any of the files and to send yourself a copy of the email.  


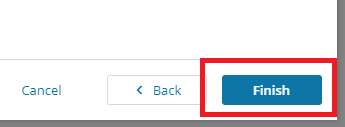
    7. When all your details are entered click Finish.


    8. Your file share is now ready. You will be presented with a link to the file share that you can provide to your users. The email containing the details of your file share has now been sent to the users.


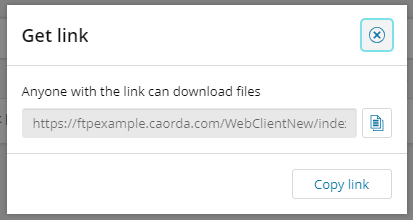
      You can close this window.
       
       
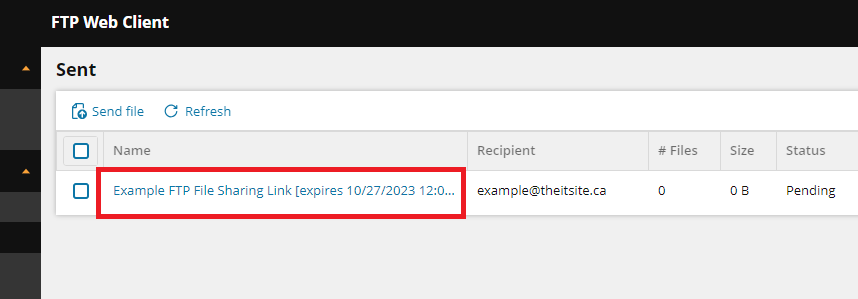
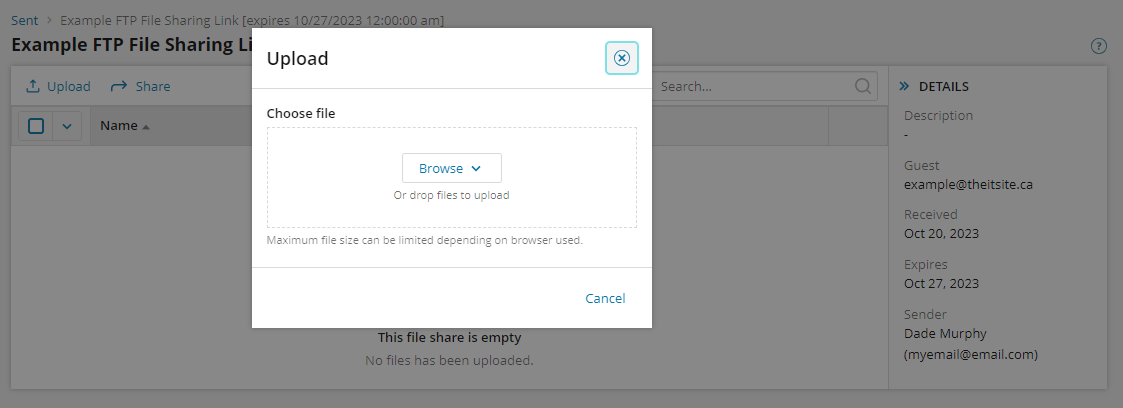
    9. You will now land back on the Sent page. Click the name of the file share you just created.


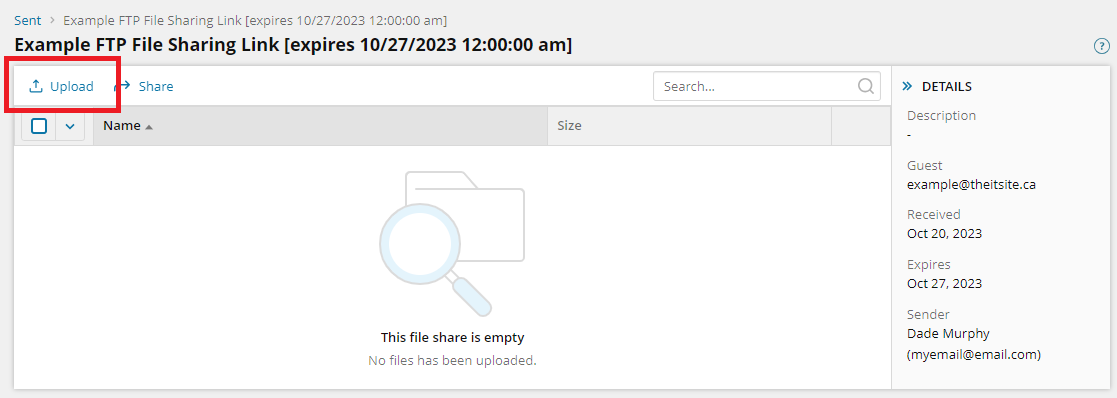
    10. Now you can upload your files. Click Upload.


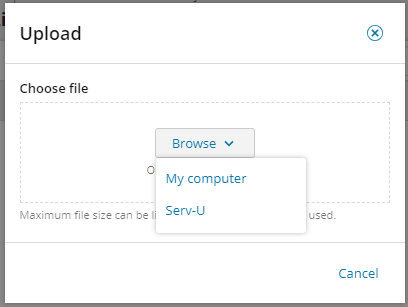
    11. The file upload window will pop-up. Either Click Browse or Drag and Drop your files into the checkered box.


      If you click on Browse you have the option to upload files from your computer or to select files that already exist on the FTP server.


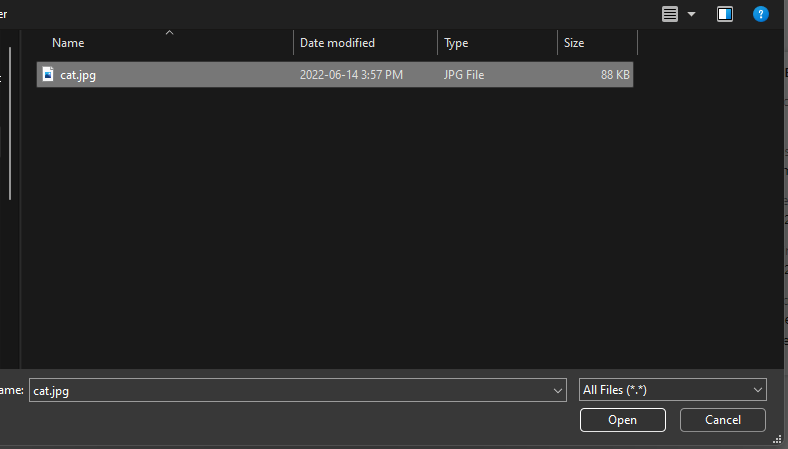
    12. Add the files you would like to share.


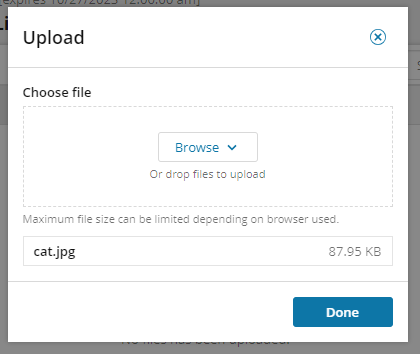
    13. Once you have uploaded your files click Done.


    14. Once you click done you will be presented with a list of the files you have uploaded.


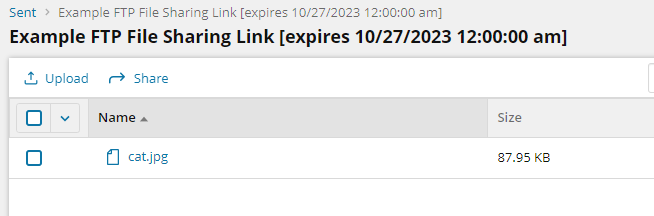
    15. Your file share is now ready for your Users.


    16. When your Users receive the link and open it in their browser they will be presented with this Send Files display. It shows the detailed that you have entered along with all the files that have been added. The Users have an option to download individual files or to download them all.


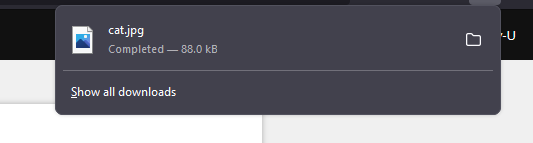
      Please Note:  Large files can sometimes take a moment to Download.


Updated on February 27, 2024
How to receive files using the File Sharing optionReset your own Multi-Factor Authentication as a User
  • This field is for validation purposes and should be left unchanged.

Our Address

401–3795 Carey Rd. Victoria, BC V8Z 6T8

Say Hello

  • +1 250.598.6772
info@caorda.com
  • Get Support
  • Our Services
  • Contact Us
  • LinkedIn
  • Facebook
  • Instagram
©2025 Caorda | Privacy Policy
Client Login
  • Design
  • Development
  • Hosting
  • Marketing