Desktop email clients allow users to add a Signature to the bottom of every outgoing email. With Caorda Webmail, adding a signature to emails sent from Webmail is a clean and streamlined experience. You have access to multiple signatures that can be assigned to aliases or addresses, assigning a different signature to a specific address, or even signatures shared by your Domain Administrators.
Please note that any signatures created and setup through the webmail will only attach to emails sent outwards via the webmail. Desktop and Mobile clients will need to be configured separately.
Navigate to your Settings
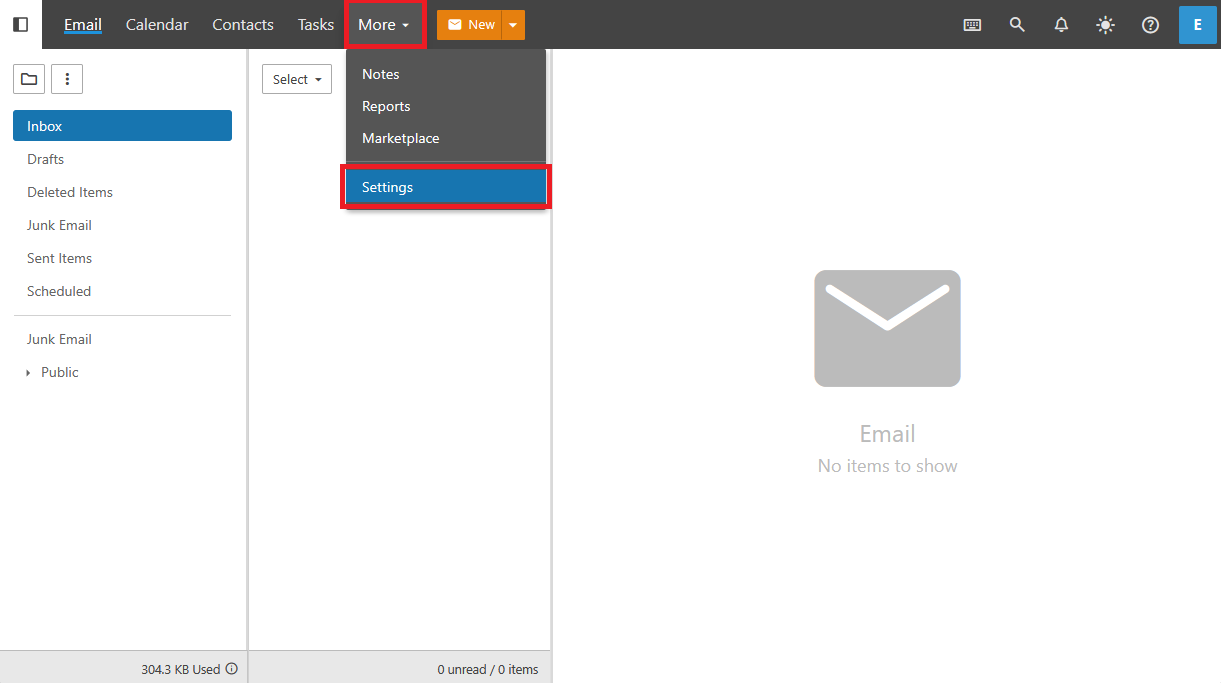
To get started first you will need to navigate to your settings. Login to your Webmail and from the More menu in the navigation select Settings.
Create a Signature
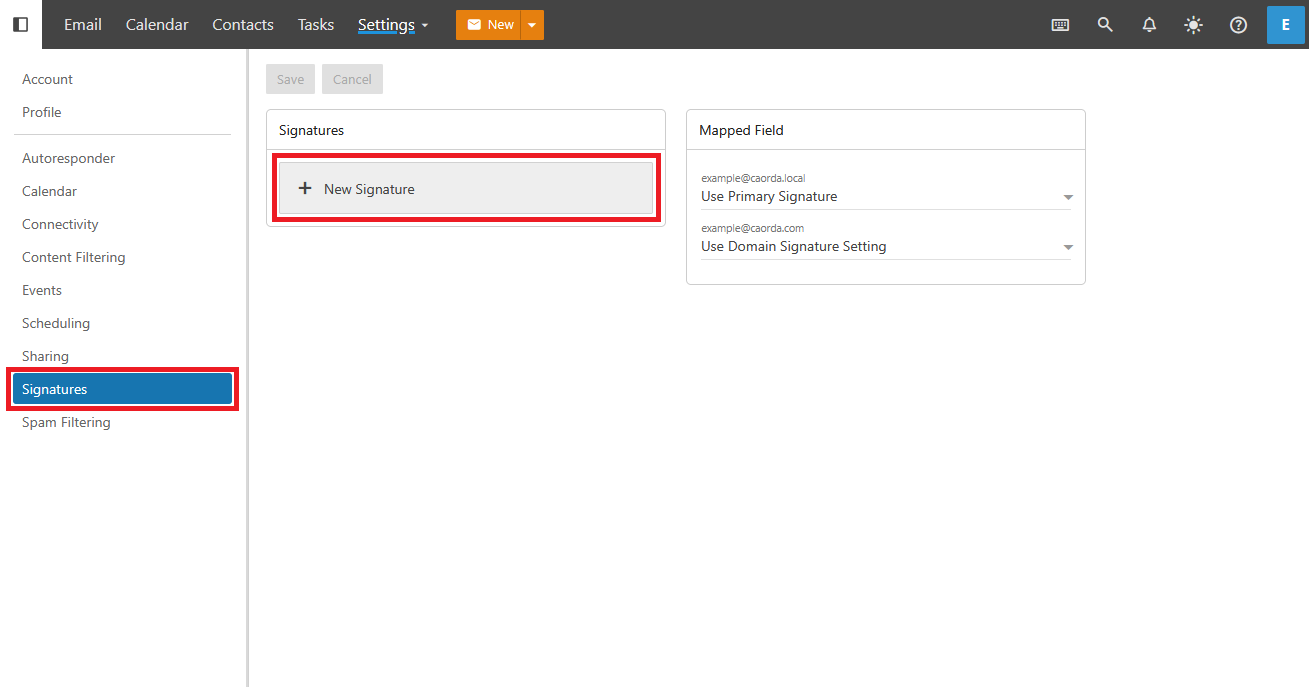
Select Signatures in the left navigation of your settings. Click or Tap the New Signature button to create a signature to attach to your email.
Add Signature details

Enter your signature as you would like. You can enter in free form text and even attach content. Select Save when you are ready to use the signature.
Map a Signature to an Address
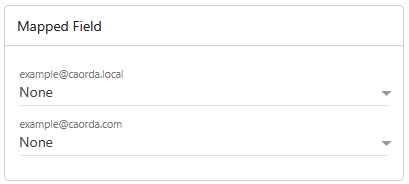
After creating a signature you will want to review the mapped field section of this settings page. This toggle maps a specific signature to a specific address. If your account has more than one address you will want to review the signatures for each address.

Select a Signature to continue.
Select & Save
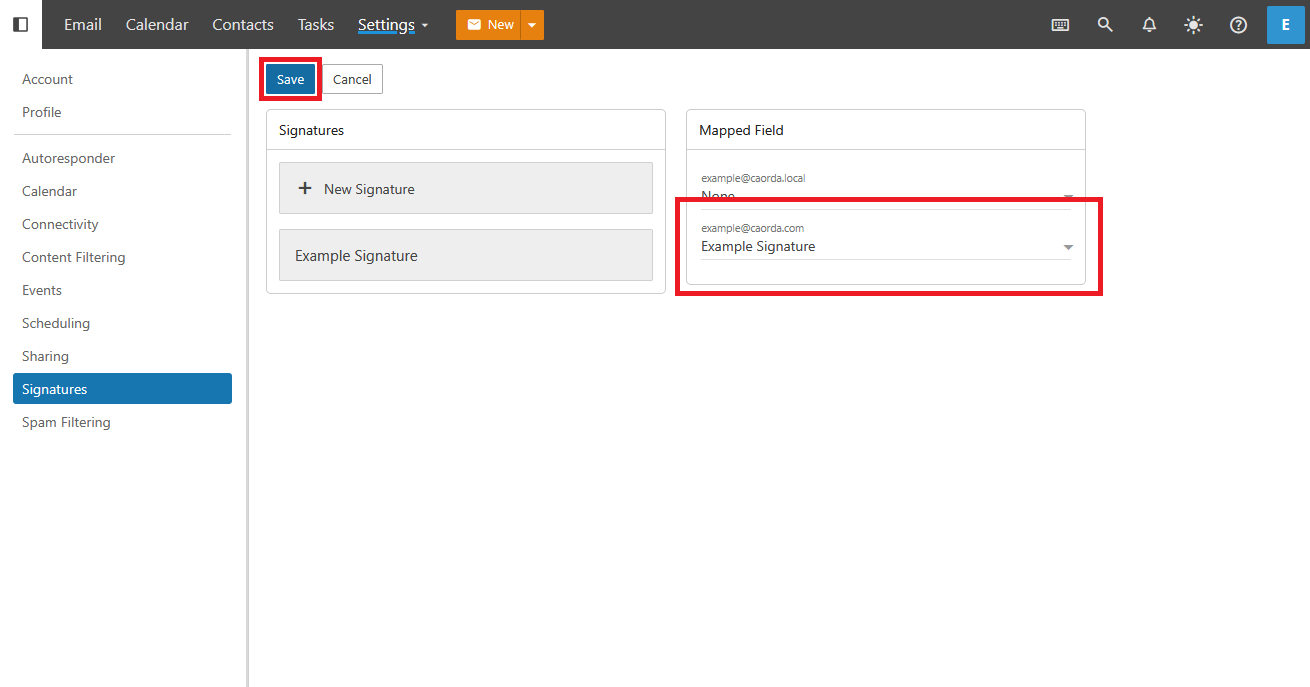
After selecting a signature you will see it listed under the email address you have assigned it to. Select save to finish. Your signature will now be attached to any outgoing emails you send via the webmail portal.